Add an Event
Step 1
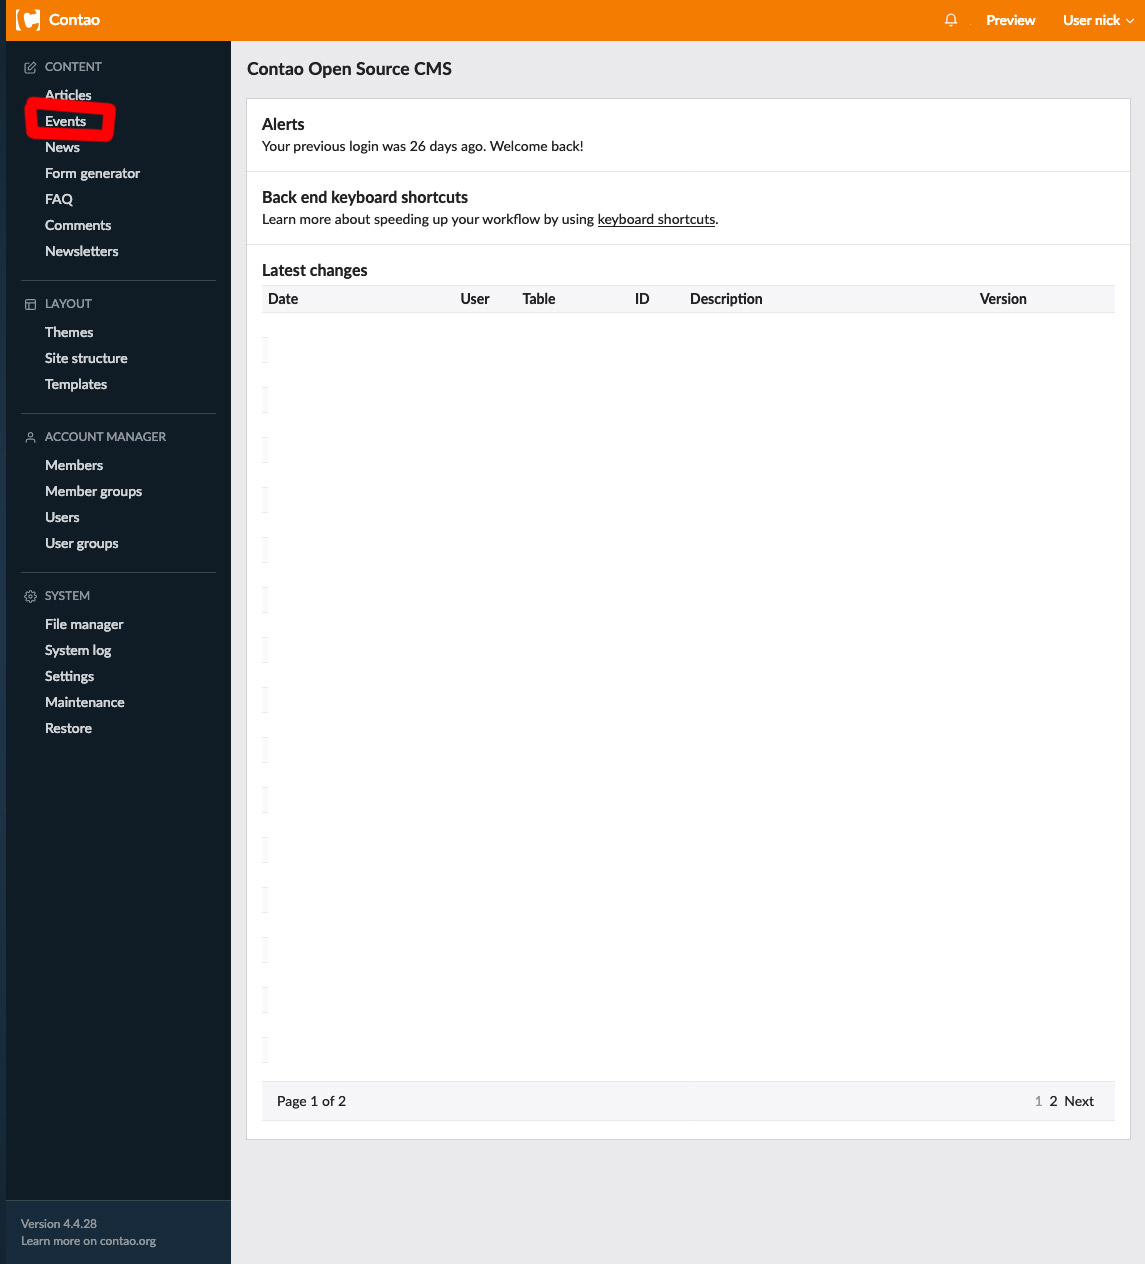
Choose Events from the navigation (circled below).
Step 2
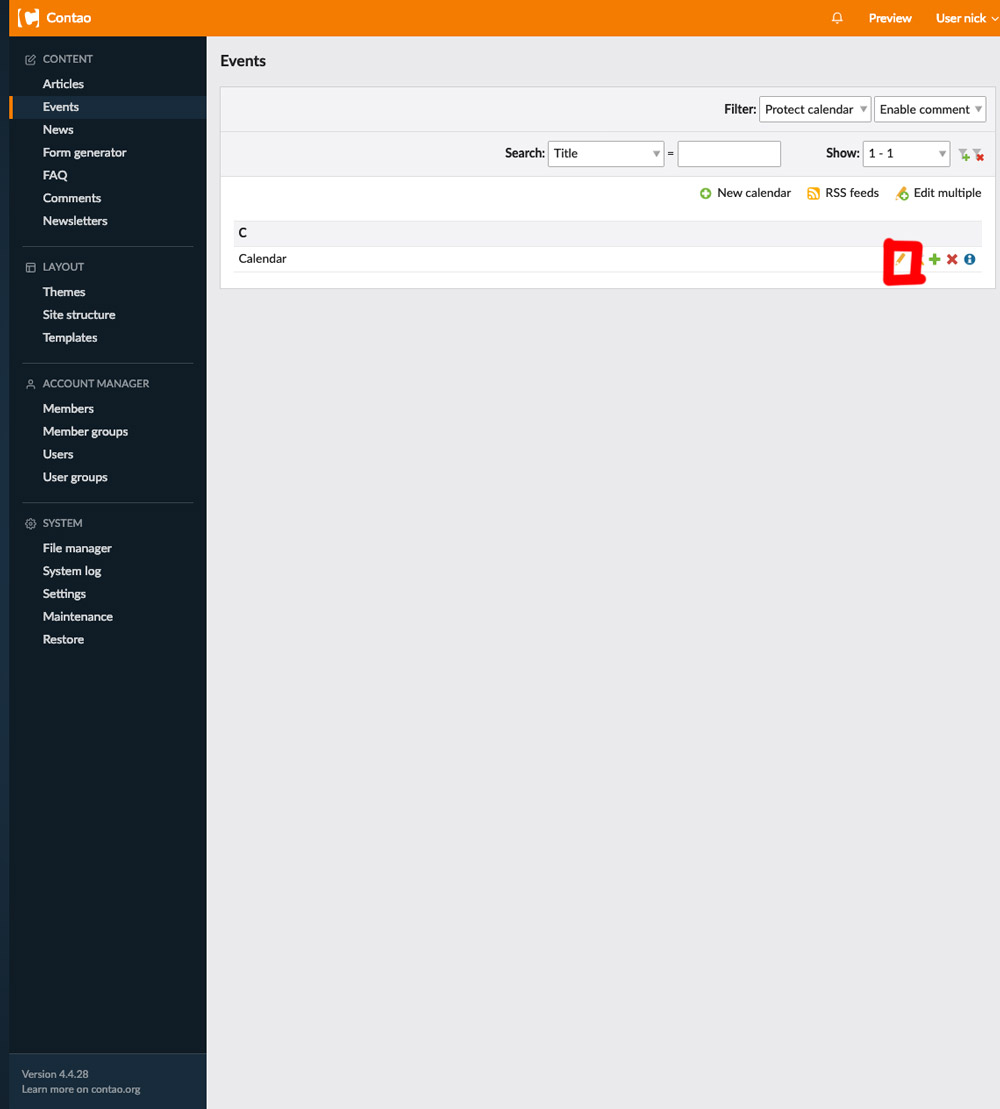
You will be brought to the events homepage. Choose the calendar you want to add an event to and click the edit icon (circled below).
Step 3
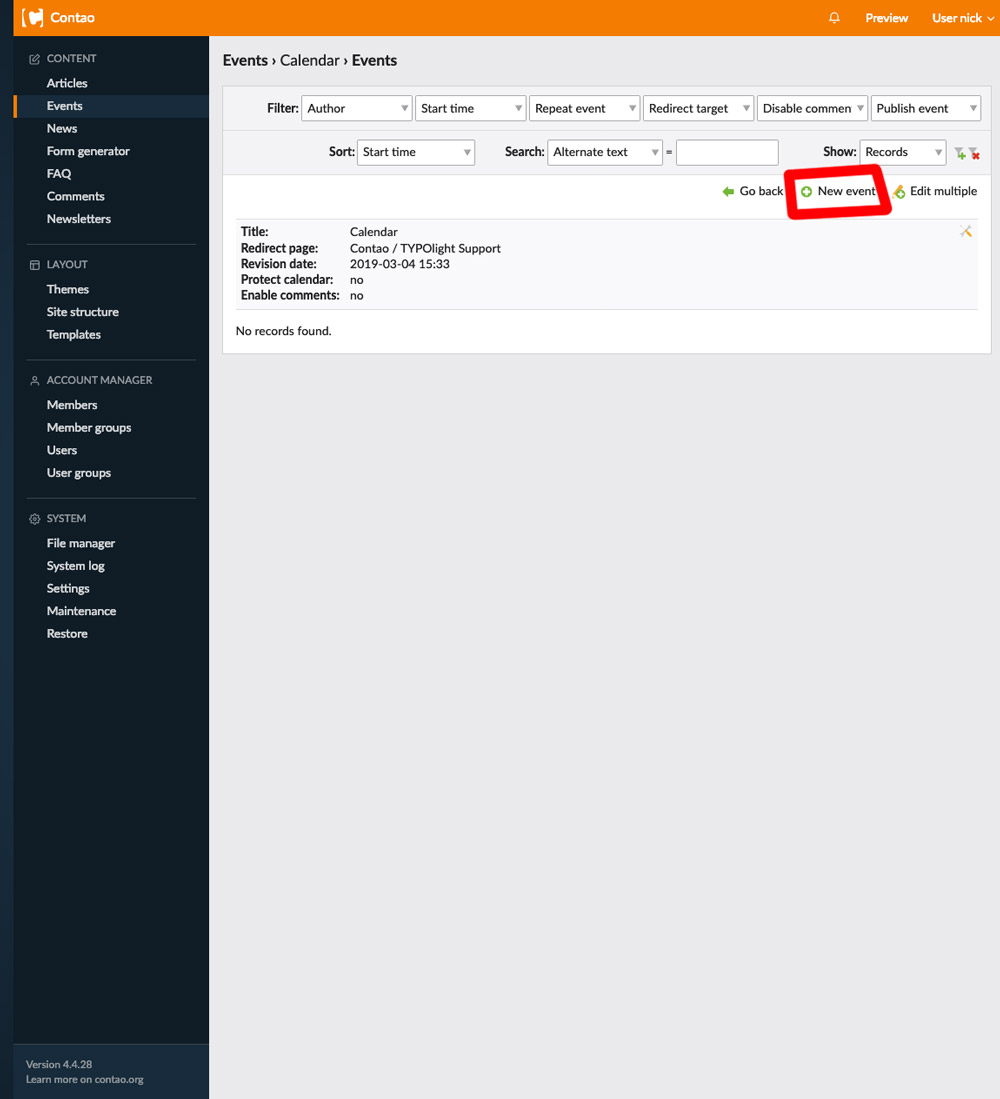
After choosing the edit icon, click new event to add the new event (circled below).
Step 4
After clicking new event you are brought to a page to fill in information. Fill out each required field and choose save and close at the bottom of the page.
Title: Enter the title of the event. (required field)
Event Alias: The name of the page in the url. There cannot be any spaces. Leave this blank for the system to create the alias from the title.
Add time: Add a start and end time to the event. Leave blank if no time is needed.
Start date: Choose the start date for your event.
End date: Choose the end date for your event. Leave blank for a one day event.
Event teaser: This is the paragraph that is shown in the event list. This should be filled in with descriptive text so the reader knows what the event is about. This is what they see before clicking to read more.Add an image: You can add an image here.
Repeat event: Choose this option to setup the event as a repeat event in your calendar. You can select how many times the event repeats and how often, days, weeks or months.
Add enclosures: Add one or more downloadable files to the event.
CSS class: Under expert settings you can enter one or more classes.
Published: Turn this on or off to make the event show up on your website.
Show from: Do not show the event on the website before this day.
Show to: Do not show the event on the website after this day. In many cases you will want to make this the same as your end date. This will automatically pull the event off your calendar and event list.
Step 5
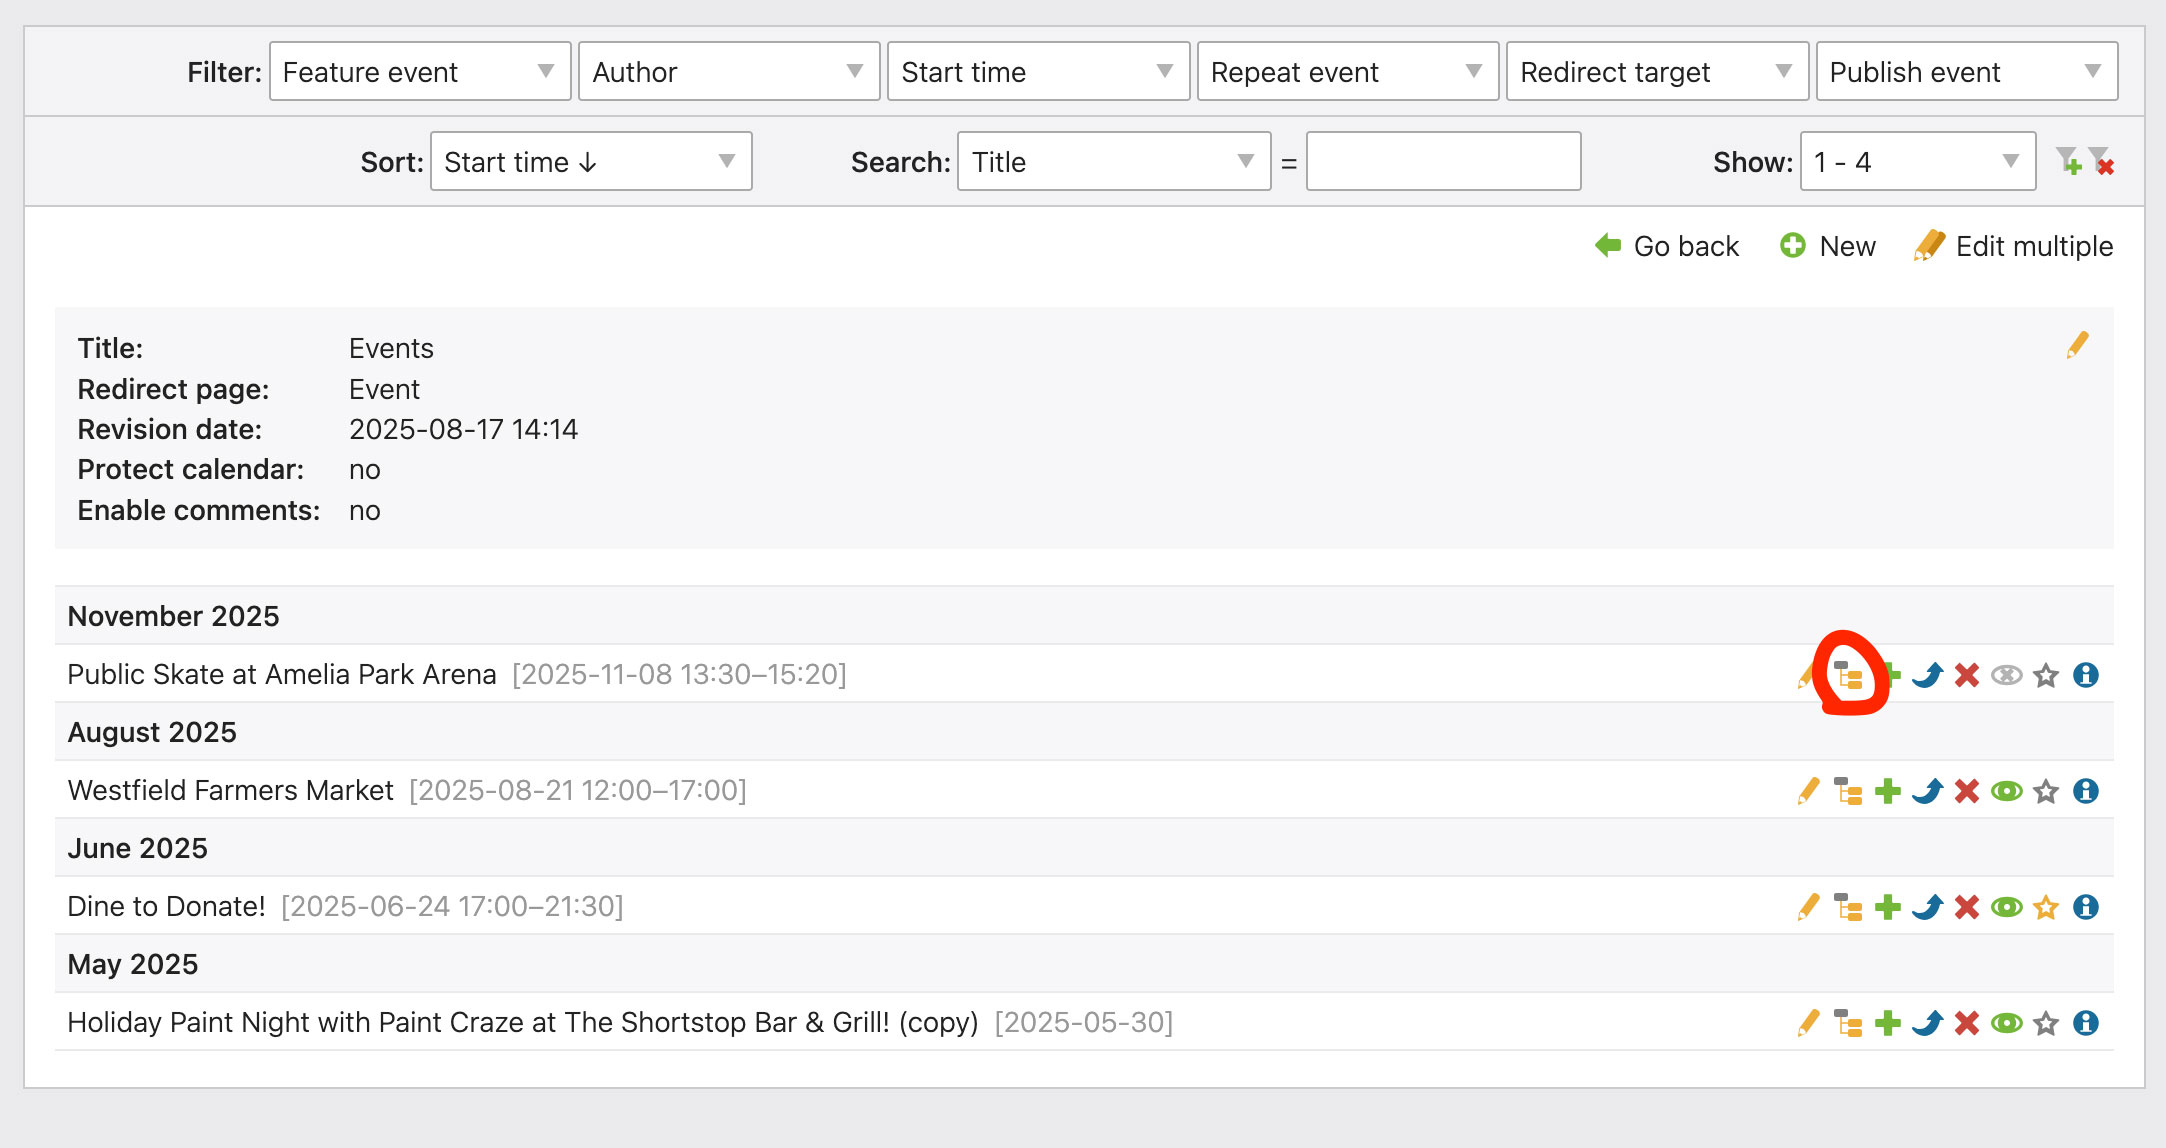
After filling in the information, click on the element icon to start adding or editing the full event elements (circled below). Event element live inside the overall event settings. If you don't do this step Contao will default to the teaser you created in the event's settings. If you do add these, the teaser is still used on the event list, but when a visitor goes to the individual events page they will see the Event Element or elements you added.
Step 6
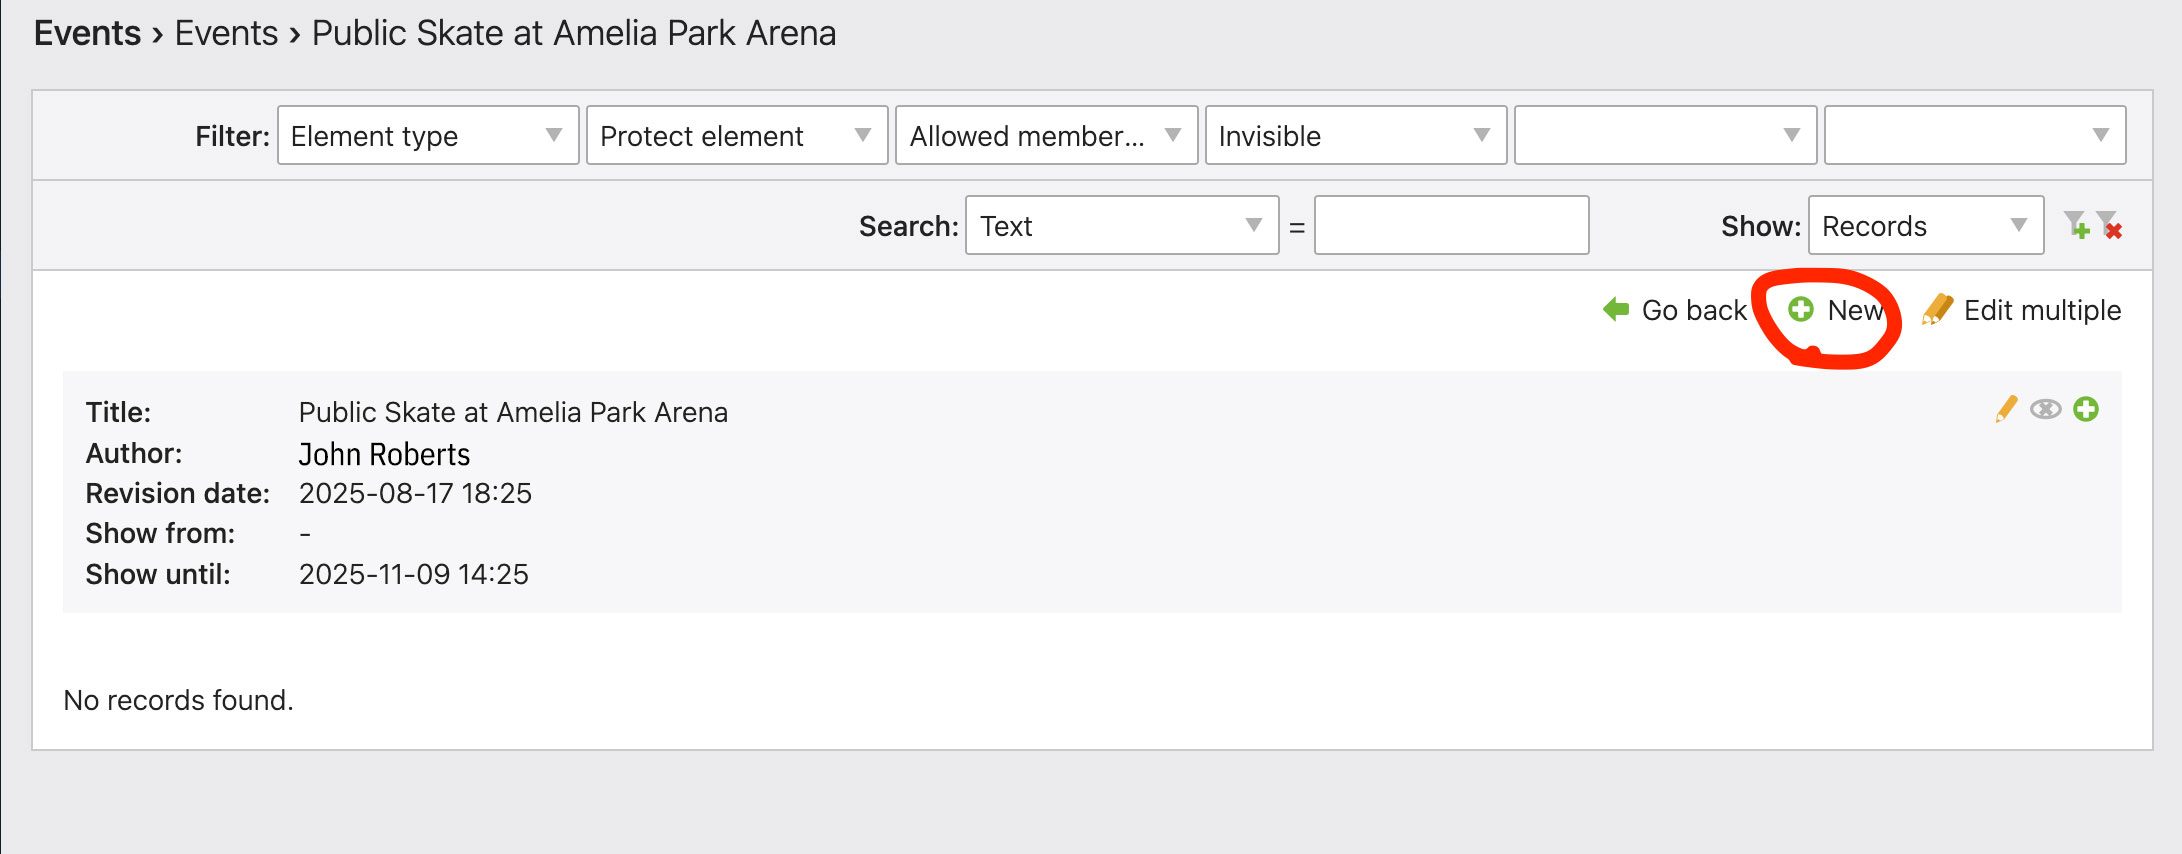
Click New to add and Event Element to your event (circled below).
Step 7
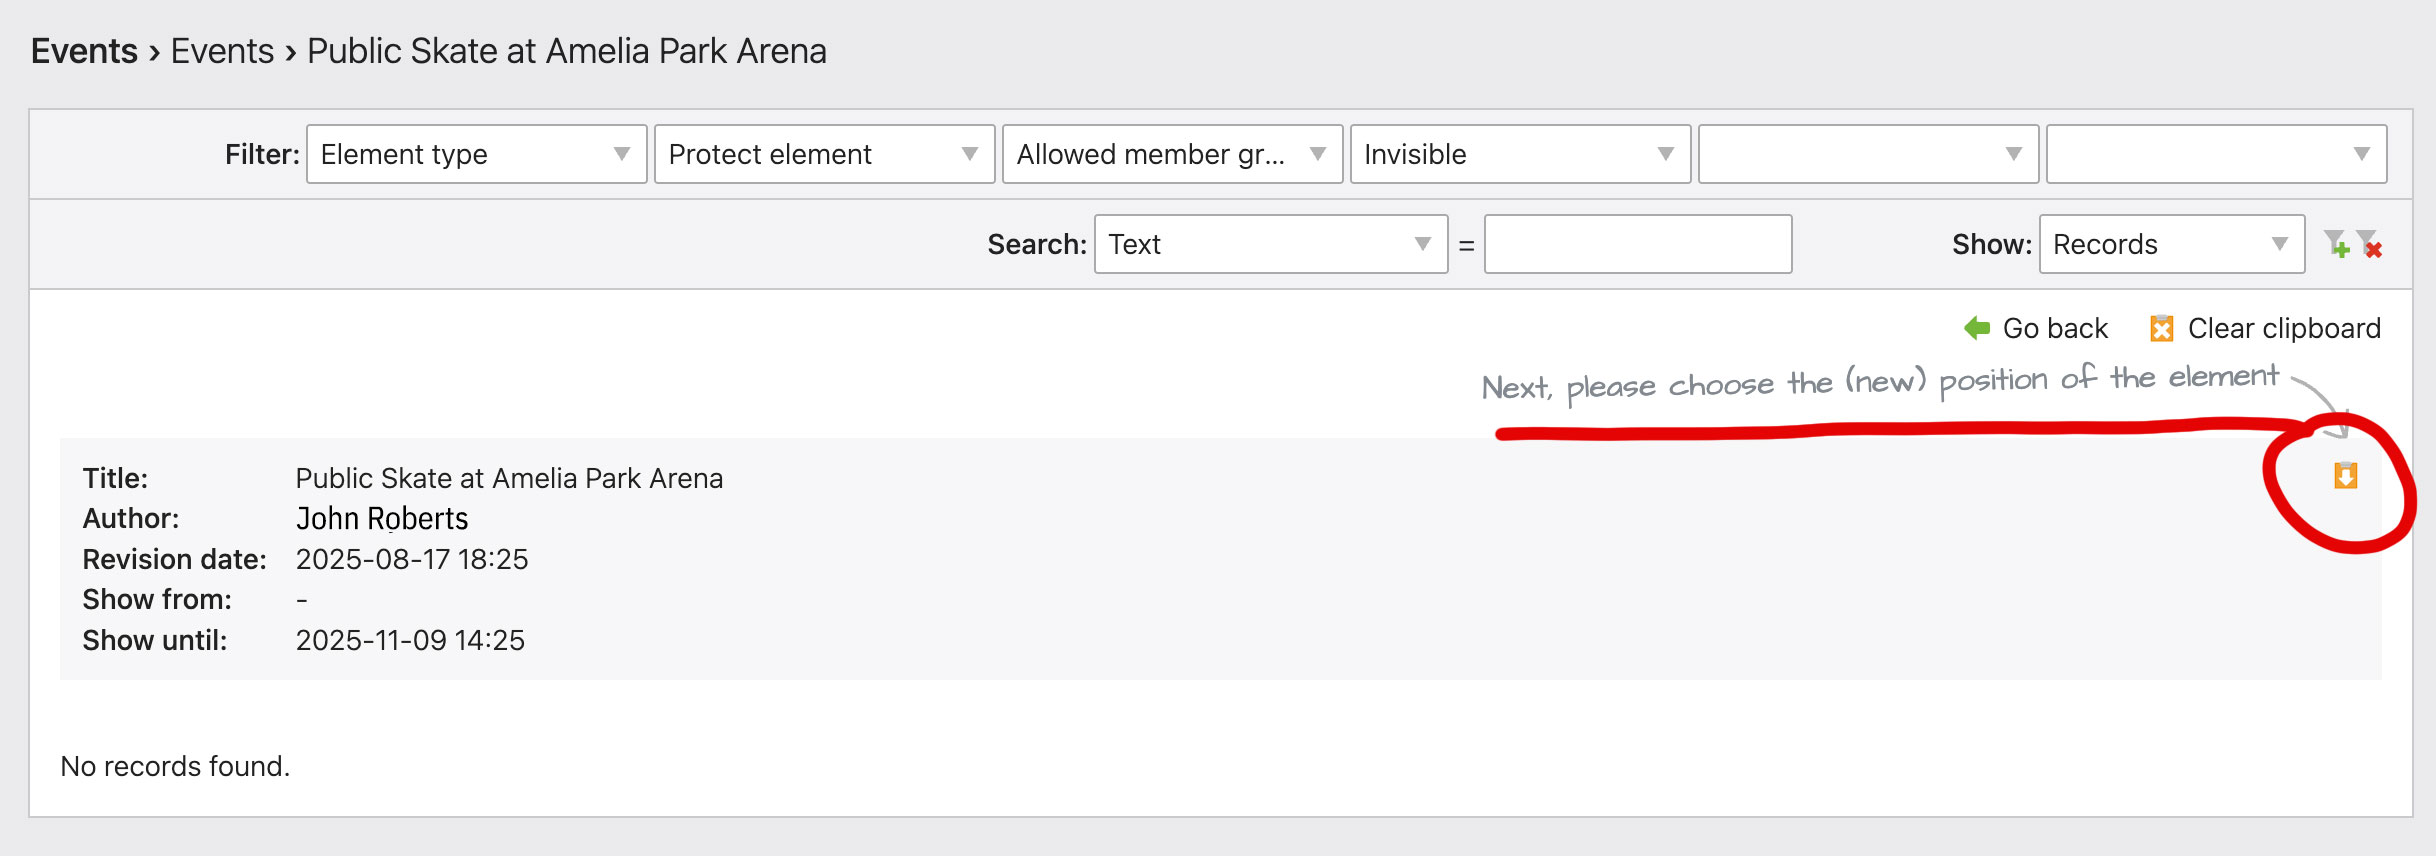
Contao uses what it calls a Clipboard to place elements in the order you want. When you choose New the next step will ask you where you want to place the element you are creating. You will see a small clipboard icon with a down arrow. This means place your new element after. If it's your first element you'll only get the one choice, but if you add multiple you'll see a Clipboard icon to the left of each element on the list.
Step 8
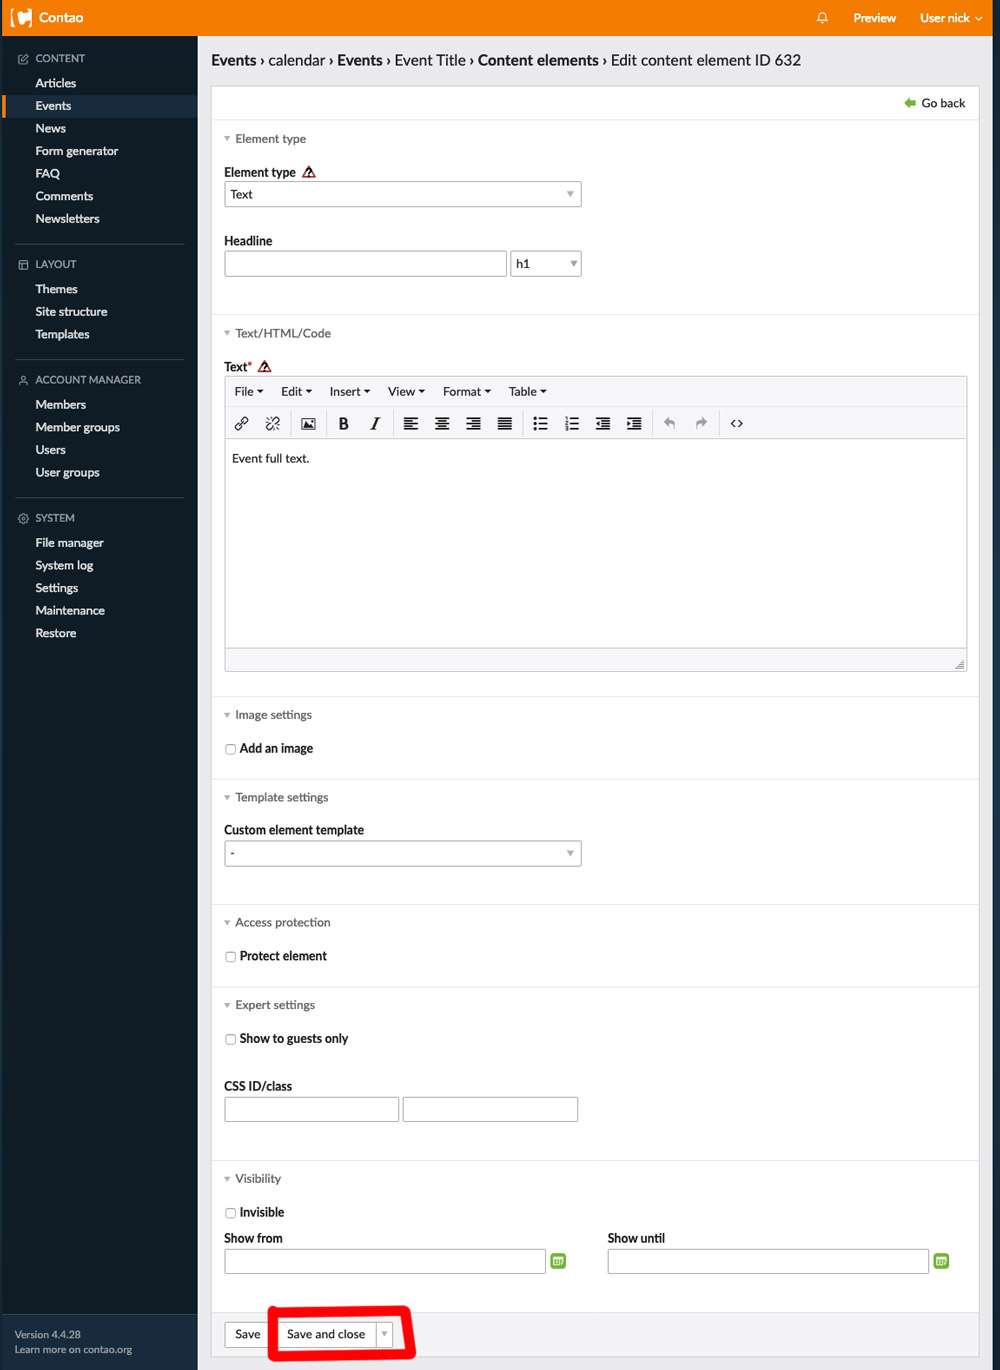
Fill in the information and then click on save and close (circled below).
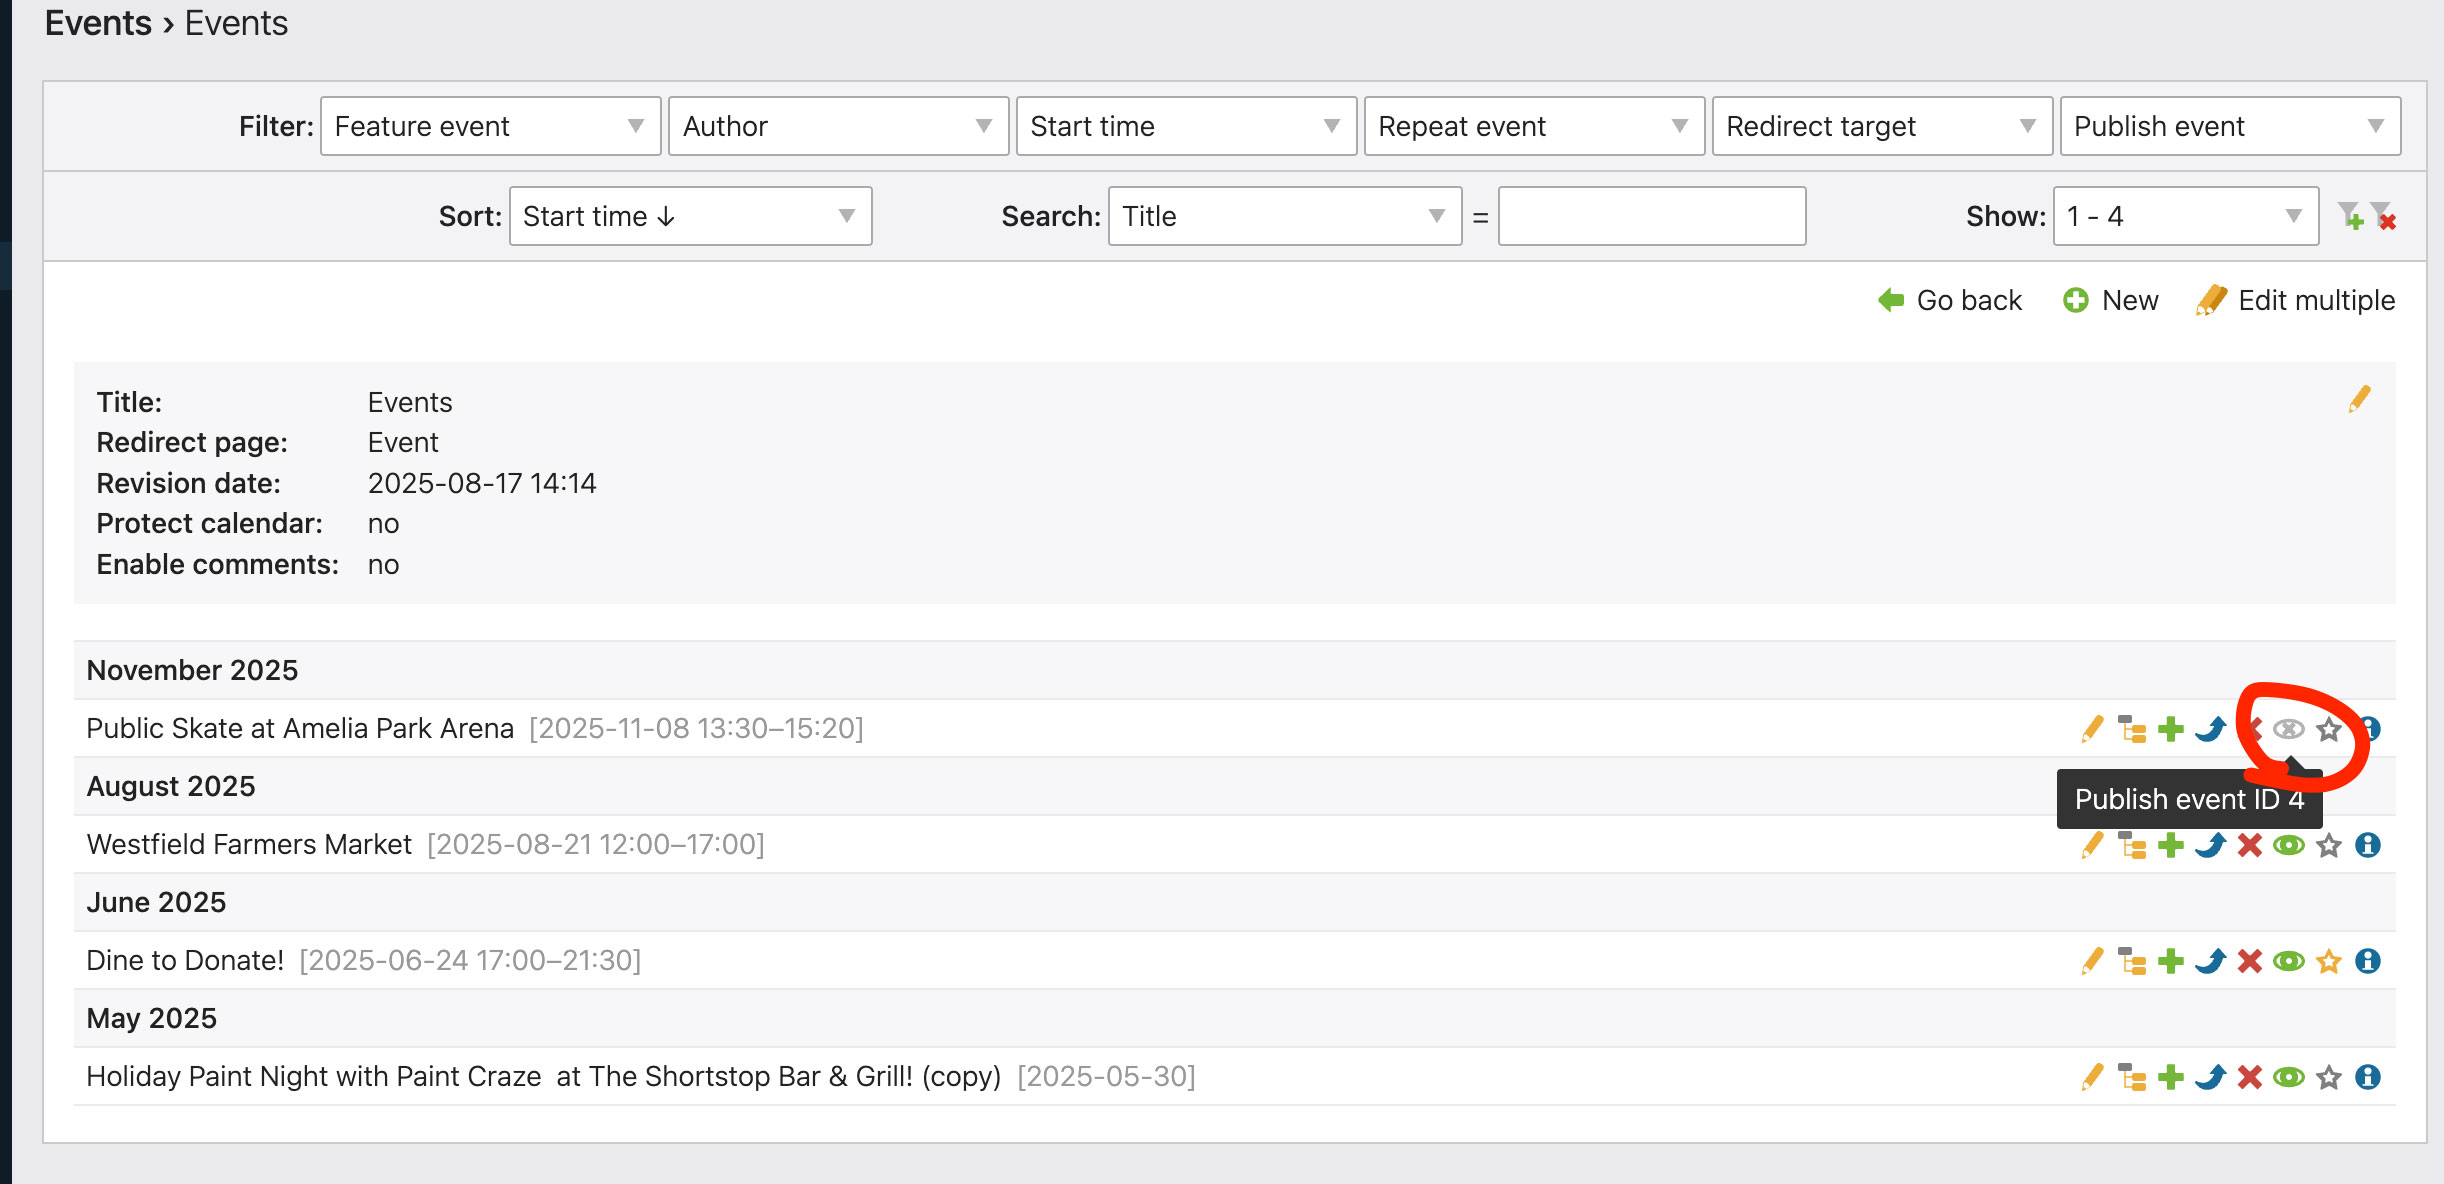
Step 9
Once your done adding elements you'll want to make sure your event is published. Go back to where all your events are listed and and click on the publish icon (the grey eye icon with the X in it. It will turn green when it is published. You can also go back into the event settings and scroll to the bottom and click the publish icon and then Save and close and it will do the same thing, but it's easier to just click the eye icon.